Django によるコメント掲示板の開発:目次
- プロジェクトの作成
- Git でコミット
- Web サーバを起動しておく
- Config
- Comments アプリケーションを作る
- はじめてのビューを作成する
- モデルを作る
- アプリケーションを有効にする
- マイグレーション
- テストデータの設定
- データベースからコメント一覧を取得して表示してみよう
- Bootstrap の導入
- コメントの詳細表示
- urls.pyの書き方
- HTML のテンプレート化
- コメントの新規投稿
- コメントの編集機能を追加する
- さらにテンプレート化
- モデル,マイグレーションファイル,フォームの関連
- 入力内容の検証(バリデーション)
- コメントを削除する
- 一覧を逆順にする
- ページネーション
- フラッシュメッセージ
- Static コンテンツの設置
- 更新や削除にもフラッシュメッセージを表示
- テストの自動化を実現しよう
- デバッグツールバーを使う
- generic モジュールを使わずにコメント一覧を取得する
- コメント一覧のページネーション
- 一覧の表示順序を制御する
- generic モジュールを使わずにコメントの詳細を表示する
- コメント詳細にページ送り機能を作成する
- generic モジュールを使わずにコメント登録機能を作成する
- generic モジュールを使わずにコメント編集機能を作成する
- generic モジュールを使わずにコメント削除機能を作成する
Django によるコメント掲示板の開発
generic モジュールを使わずにコメント一覧を取得する
ここまでは generic モジュールを使ってデータベースから必要なデータを取得してきました.この generic モジュールを使うことでここで示した sample code 1のようにモデルを指定するだけで必要なデータがデータベースから取得されるとともに,その結果が html のテンプレートに渡されます.同じコードを再度示します.
comments/views.py
from django.views.generic import ListView
from .models import Comment

# Create your views here.
class CommentIndexView(ListView):
  model = Comment
しかしながら,より複雑な処理を行いたいような場合は,generic モジュールを使わずにデータベースからデータを取得する必要が出てくる可能性があります.これ以降のページではそのような方法を説明します.
まず,views.py にある CommentIndexView( ) クラスの定義を削除するかコメントアウトします.これに伴い,from django.views.generic import ListView も不要になります.次に,comments_index( ) 関数を定義し,render をインポートします.
comments/views.py
from django.shortcuts import render
# from django.http import HttpResponse
from django.urls import reverse_lazy
# from django.views.generic import ListView
from django.views.generic import DetailView
from django.views.generic import CreateView
from django.views.generic import UpdateView
from django.views.generic import DeleteView
from django.shortcuts import redirect
from django.contrib import messages
from .forms import CommentForm
from .models import Comment

# Create your views here.

# class CommentIndexView(ListView):
#     model = Comment
#     queryset = Comment.objects.order_by('-updated_at')
#     paginate_by = 2

def comments_index(request):
    context = {}
    context['comments'] = Comment.objects.all()
    return render(request, 'comments/index.html', context)
次に urls.py を次のように変更します.
comments/urls.py
from django.urls import path

from . import views

app_name = 'comments'
urlpatterns = [
    path('', views.comments_index, name='index'),
    path('<int:pk>/', ShowCommentView.as_view(), name='show'),
    path('create/', CreateCommentView.as_view(), name='create'),
    path('<int:pk>/update/', UpdateCommentView.as_view(), name='update'),
    path('<int:pk>/delete/', DeleteCommentView.as_view(), name='delete'),
]
最後に HTML のテンプレートを変更します.generic モジュールを使うときには モデル名_list.html というルールでファイル名を命名する必要がありましたが,その必要はなくなったのでファイル名をcomment_list.html から index.html に変更した上で,次のように修正します.
comments/templates/comments/index.html (comment_list.htmlからファイル名を変更)
{% extends "base.html" %}

{% block title %}
コメント一覧
{% endblock %}

{% block content %}
  <div class="container">
    <h1 class="my-5">コメント一覧</h1>
    {% for comment in comments %}
    <div class="card mb-3">
      <div class="card-body">
        <h5 class="card-title">
          <a href="{% url 'comments:show' comment.id  %}">
            {{ comment.title }}
          </a>
        </h5>
        <p class="card-text">{{ comment.body }}</p>
      </div>
    </div>
    {% endfor %}
    {% include 'simple_pagination.html' %}
    <hr>
    <div>
      <a href="{% url 'comments:create' %}">
        <p>
          新規コメントの投稿
        </p>
      </a>
    </div>
  </div>
{% endblock content %}
なお,この index.html というファイル名は views.py の中で指定されてもので,object_list を comments に変更する必要性も views.py の中で指定されていることを読めば理解できるはずです.
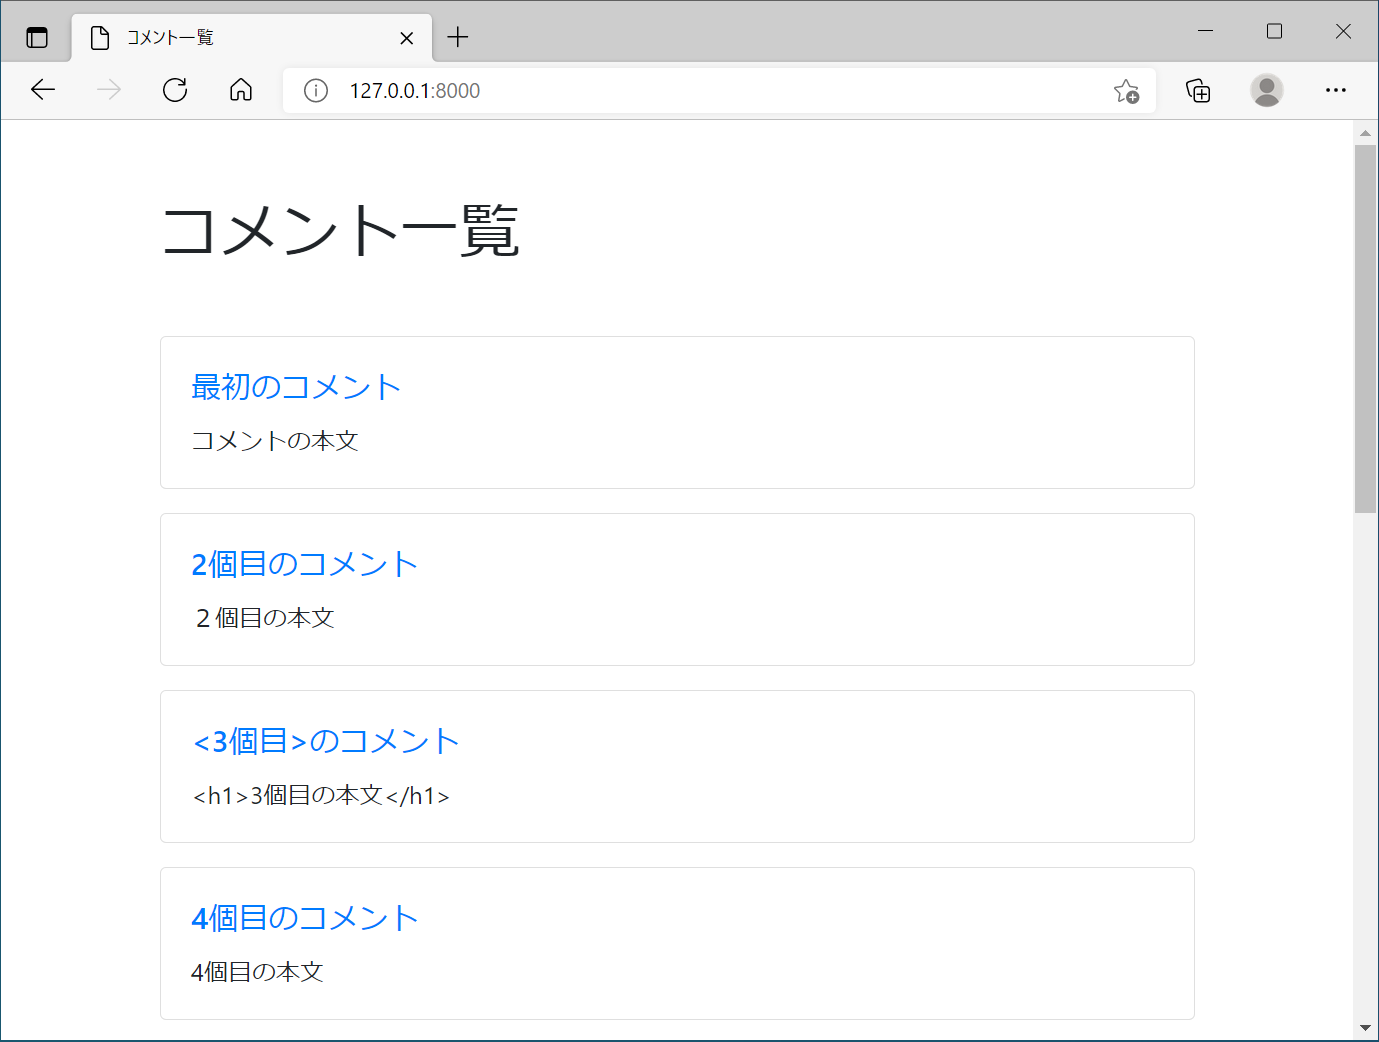
Webサーバを起動してブラウザで動作を確認します.
python manage.py runserver ⏎
次のページではページネーションを実現します.
