目次
- Composerのダウンロードとインストール
- コメント掲示板を作成してみよう
- リレーションシップを使いこなそう
- ユーザ認証の機能を実現しよう
- マルチ認証の機能を実現しよう
- MongoDB に接続しよう
- キューを利用しよう
- コマンド(コンソール)を利用しよう
- 本番環境にデプロイしよう
本番環境にデプロイしよう
本番環境にデプロイしよう
概要
これまでは php artisan serve コマンドを使って開発用の Web サーバを起動して Web システムの動作確認を行ってきた.しかしながら,開発用の Web サーバを使って本番環境を構築することは決してお勧めできない.ここでは,Apache Web サーバに Laravel で開発したシステムをデプロイ(導入)して外部の Web ブラウザからアクセスできるようにする方法について説明する.
なお,ここでは Vagrant で構築した CentOS 7 の仮想OS上に,Ansible によって Web サーバや PHP などがインストール済みであることを前提にしています.
環境の確認
まず,仮想マシンの IP アドレスを調べておく.調べるには,ip a コマンドを使うと良い.あるいは,Vagrant 環境であれば,ホストマシンの Vagrantfile を参照しても良い.IP アドレスが 192.168.33.120 であるとして作業を続ける.
[vagrant@localhost ~]$ ip a ⏎
1: lo: <LOOPBACK,UP,LOWER_UP> mtu 65536 qdisc noqueue state UNKNOWN group default qlen 1000
    link/loopback 00:00:00:00:00:00 brd 00:00:00:00:00:00
    inet 127.0.0.1/8 scope host lo
       valid_lft forever preferred_lft forever
    inet6 ::1/128 scope host
       valid_lft forever preferred_lft forever
2: eth0: <BROADCAST,MULTICAST,UP,LOWER_UP> mtu 1500 qdisc pfifo_fast state UP group default qlen 1000
    link/ether 52:54:00:8a:fe:e6 brd ff:ff:ff:ff:ff:ff
    inet 10.0.2.15/24 brd 10.0.2.255 scope global noprefixroute dynamic eth0
       valid_lft 86350sec preferred_lft 86350sec
    inet6 fe80::5054:ff:fe8a:fee6/64 scope link
       valid_lft forever preferred_lft forever
3: eth1: <BROADCAST,MULTICAST,UP,LOWER_UP> mtu 1500 qdisc pfifo_fast state UP group default qlen 1000
    link/ether 08:00:27:59:45:40 brd ff:ff:ff:ff:ff:ff
    inet 192.168.33.120/24 brd 192.168.33.255 scope global noprefixroute eth1
       valid_lft forever preferred_lft forever
    inet6 fe80::a00:27ff:fe59:4540/64 scope link
       valid_lft forever preferred_lft forever
[vagrant@localhost ~]$
次に,Apache (httpd) のインストールを確認する.
[root@localhost vagrant]# yum list installed | grep httpd ⏎
httpd.x86_64                       2.4.6-90.el7.centos        @base
httpd-devel.x86_64                 2.4.6-90.el7.centos        @base
httpd-tools.x86_64                 2.4.6-90.el7.centos        @base
[root@localhost vagrant]#
OSの起動時に Apache (httpd) が自動起動するかどうかの設定確認と,すでに Apache が起動しているかを確認する.
[vagrant@localhost ~]$ sudo systemctl is-enabled httpd ⏎
enabled
[vagrant@localhost ~]$ sudo systemctl status httpd ⏎
● httpd.service - The Apache HTTP Server
   Loaded: loaded (/usr/lib/systemd/system/httpd.service; enabled; vendor preset: disabled)
   Active: active (running) since 月 2020-03-30 01:05:28 JST; 10min ago
     Docs: man:httpd(8)
なお,自動起動の設定を切り替えるには次のように行います(自動機能を一旦 off にしたあと,また on に戻しています).
[vagrant@localhost ~]$ sudo systemctl is-enabled httpd ⏎
enabled
[vagrant@localhost ~]$ sudo systemctl disable httpd ⏎
Removed symlink /etc/systemd/system/multi-user.target.wants/httpd.service.
[vagrant@localhost ~]$ sudo systemctl is-enabled httpd ⏎
disabled
[vagrant@localhost ~]$ sudo systemctl enable httpd ⏎
Created symlink from /etc/systemd/system/multi-user.target.wants/httpd.service to /usr/lib/systemd/system/httpd.service.
[vagrant@localhost ~]$ sudo systemctl is-enabled httpd ⏎
enabled
[vagrant@localhost ~]$
また,Web サーバを停止,起動,再起動するには次のようなコマンドを入力します.
[vagrant@localhost ~]$ sudo systemctl stop httpd ⏎
[vagrant@localhost ~]$ sudo systemctl status httpd ⏎
● httpd.service - The Apache HTTP Server
   Loaded: loaded (/usr/lib/systemd/system/httpd.service; enabled; vendor preset: disabled)
   Active: inactive (dead) since 月 2020-03-30 01:21:41 JST; 4s ago

   ...(中略)...

[vagrant@localhost ~]$ sudo systemctl start httpd ⏎
[vagrant@localhost ~]$ sudo systemctl status httpd ⏎
● httpd.service - The Apache HTTP Server
   Loaded: loaded (/usr/lib/systemd/system/httpd.service; enabled; vendor preset: disabled)
   Active: active (running) since 月 2020-03-30 01:21:58 JST; 3s ago

   ...(中略)...

[vagrant@localhost ~]$ sudo systemctl restart httpd ⏎
[vagrant@localhost ~]$
HTML コンテツの設置
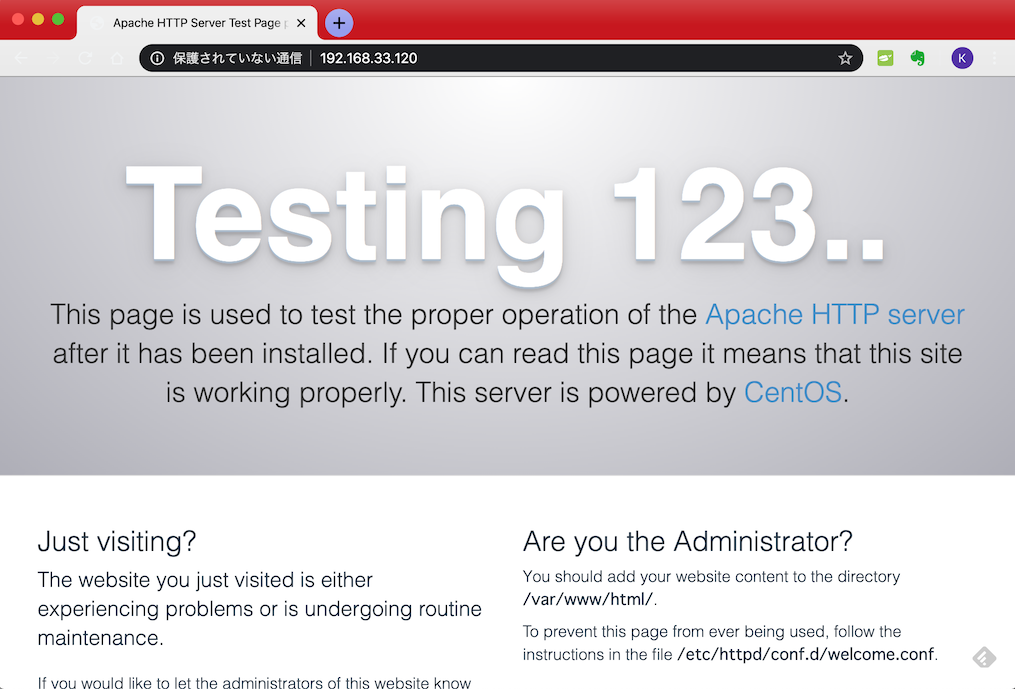
IP アドレス 192.168.33.120 のマシンで Web サーバが起動しているので,Web ブラウザで http://192.168.33.120/ にアクセスしてみる.次のような画面が表示されれば問題ない.
標準では /var/www/html/ 以下に Web ページのコンテンツを配置すれば良い.まずフォルダが空であることを確認して,そこに index.html を配置する.
[vagrant@localhost ~]$ cd /var/www/html/ ⏎
[vagrant@localhost html]$ pwd ⏎
/var/www/html
[vagrant@localhost html]$ ls ⏎
[vagrant@localhost html]$ touch index.html ⏎
[vagrant@localhost html]$
/var/www/html/index.html
<!DOCTYPE html>
<html lang="ja">
<head>
<meta charset="utf-8">
<title>テストページ</title>
</head>
<body>
<p>テストページ</p>
</body>
</html>
/var/www/html/index.html ファイルの作成後に再度 Web ブラウザでアクセスすると,次のようなテストページが表示されるはずである.

PHP の動作確認
次は,PHP が正しく動作していることを確認しよう./var/www/html/ に任意のファイル名で php ファイルを設置してみる.ここでは,phpinfo.php というファイル名にした.
/var/www/html/phpinfo.php
<?php
phpinfo();
?>
Web ブラウザで http://192.168.33.120/phpinfo.php にアクセスすると次のような画面が表示される.

もしも上のような画面が表示されず,phpinfo.php の内容がそのまま表示される場合は,httpd.conf の最後に次の2行を追加して,httpd を再起動してみると良い.
/etc/httpd/conf/httpd.conf
AddHandler php7-script .php
DirectoryIndex index.php
実際に本番環境に利用するのであれば,セキュリティ上のリスクを考慮して,phpinfo.php は削除しておく.
[vagrant@localhost html]$ ls ⏎
index.html  phpinfo.php
[vagrant@localhost html]$ rm phpinfo.php ⏎
[vagrant@localhost html]$ ls ⏎
index.html
[vagrant@localhost html]$
/var/www/html/comments/ フォルダが存在しない(/var/www/html/comments/index.html がない)ので,http://192.168.33.120/comments/ にアクセスすると次のようなエラーが表示されるはずである.以下では,この http://192.168.33.120/comments/ にアクセスしたときに Laravel で開発したシステムが表示されるようにしよう.

Laravel プロジェクトの作成(クローンの作成)
/home/vagrant/Documents/Laravel/ 以下にプロジェクトを作成するか,Github で公開しているプロジェクトのクローンを作成する.ここではクローンを作成してみよう.
[vagrant@localhost ~]$ cd Documents/laravel/ ⏎
[vagrant@localhost laravel]$ pwd ⏎
/home/vagrant/Documents/laravel
[vagrant@localhost laravel]$ git clone git@github.com:rinsaka/semi-laravel-comments5.8.git ⏎
[vagrant@localhost laravel]$ ls ⏎
composer.phar  semi-laravel-comments5.8
[vagrant@localhost laravel]$ mv semi-laravel-comments5.8 comments ⏎
Git のリポジトリには含まれていないパッケージをインストールする.
[vagrant@localhost laravel]$ ls ⏎
comments  composer.phar
[vagrant@localhost laravel]$ cd comments/ ⏎
[vagrant@localhost comments]$ php ../composer.phar install ⏎
.env の編集
.env ファイル(DBへの接続パスワードなどを記述している)も Git に含まれていないので,サンプルファイルをコピーする.
[vagrant@localhost comments]$ cp .env.example .env ⏎
[vagrant@localhost comments]$
.env には アプリケーションキーとデータベースへの接続情報が正しく設定されていない.
.env
APP_NAME=Laravel
APP_ENV=local
APP_KEY=
APP_DEBUG=true
APP_URL=http://localhost

LOG_CHANNEL=stack

DB_CONNECTION=mysql
DB_HOST=127.0.0.1
DB_PORT=3306
DB_DATABASE=homestead
DB_USERNAME=homestead
DB_PASSWORD=secret
アプリケーションキー (APP_KEY) を生成する.
[vagrant@localhost comments]$ php artisan key:generate ⏎
Application key set successfully.
[vagrant@localhost comments]$
上のコマンドで,アプリケーションキーが生成されたので,あとはデータベースの接続先を sqlite に書き換え,MySQLでは必要であるパスワードなどの項目を削除するかコメントアウトする.
.env(抜粋)
APP_NAME=Laravel
APP_ENV=local
APP_KEY=base64:0KVwxlB6v17XWyPV1WaTm9eQZbzKOmTlGrjuDpkMjAU=
APP_DEBUG=true
APP_URL=http://localhost

LOG_CHANNEL=stack

DB_CONNECTION=sqlite
#DB_CONNECTION=mysql
#DB_HOST=127.0.0.1
#DB_PORT=3306
#DB_DATABASE=homestead
#DB_USERNAME=homestead
#DB_PASSWORD=secret
データベースのマイグレーションとシーダー
今回はデータベースに SQLite を利用するので,database/database.sqlite を作成する.
[vagrant@localhost comments]$ ls database/ ⏎
factories  migrations  seeds
[vagrant@localhost comments]$ touch database/database.sqlite ⏎
[vagrant@localhost comments]$ ls database/ ⏎
database.sqlite  factories  migrations  seeds
[vagrant@localhost comments]$
マイグレーションによってテーブルを作成し,シーダによって初期データを投入する.
[vagrant@localhost comments]$ php artisan migrate ⏎
Migration table created successfully.
Migrating: 2019_09_26_100151_create_comments_table
Migrated:  2019_09_26_100151_create_comments_table (0 seconds)
[vagrant@localhost comments]$ php artisan db:seed ⏎
Seeding: CommentsTableSeeder
Database seeding completed successfully.
[vagrant@localhost comments]$
開発用サーバで動作確認
開発用の Web サーバを起動してプラウザから http://192.168.33.129:8000/ にアクセスしてみる.
[vagrant@localhost comments]$ php artisan serve --host=192.168.33.120 --port 8000 ⏎
Laravel development server started: <http://192.168.33.120:8000>
無事に動作すれば,次は本番環境の Apache で動作させよう.
Laravel プロジェクトのデプロイ
ようやく,Apache に Laravel プロジェクトをデプロイする準備が整った.今回は Laravel プロジェクトを /var/www/laravel/ 以下に設置することにする.間違っても /var/www/html/ に置いてはならない.理由は明らかで,/var/www/html/ 以下に設置すると,データベースの database.sqlite や .env なども含めて,全てのファイルにブラウザからアクセス(ダウンロード)出来てしまう可能性があるからである.
フォルダを作成してプロジェクトを移動する
Laravel プロジェクトを設置する /var/www/laravel/ フォルダを作成する.
[vagrant@localhost www]$ pwd ⏎
/var/www
[vagrant@localhost www]$ ls -l ⏎
合計 0
drwxr-xr-x. 2 root    root  6  8月  8  2019 cgi-bin
drwxr-xr-x. 2 vagrant root 24  3月 29 14:52 html
[vagrant@localhost www]$ sudo mkdir laravel ⏎
[vagrant@localhost www]$ sudo chown vagrant:apache laravel ⏎
[vagrant@localhost www]$ ls -l ⏎
合計 0
drwxr-xr-x. 2 root    root    6  8月  8  2019 cgi-bin
drwxr-xr-x. 2 vagrant root   24  3月 29 14:52 html
drwxr-xr-x. 2 vagrant apache  6  3月 29 14:56 laravel
[vagrant@localhost www]$ chmod 775 laravel ⏎
[vagrant@localhost www]$ ls -l ⏎
合計 0
drwxr-xr-x. 2 root    root    6  8月  8  2019 cgi-bin
drwxr-xr-x. 2 vagrant root   24  3月 29 14:52 html
drwxrwxr-x. 2 vagrant apache  6  3月 29 14:56 laravel
[vagrant@localhost www]$
Laravel プロジェクトを移動する.
[vagrant@localhost www]$ cd ⏎
[vagrant@localhost ~]$ cd Documents/laravel/ ⏎
[vagrant@localhost laravel]$ ls ⏎
comments  composer.phar
[vagrant@localhost laravel]$ mv comments /var/www/laravel/ ⏎
[vagrant@localhost laravel]$
ファイルやフォルダのアクセス権を設定する.まず,現状を確認する.
[vagrant@localhost ~]$ cd /var/www/laravel/comments/ ⏎
[vagrant@localhost comments]$ ls -l ⏎
合計 204
drwxrwxr-x.  6 vagrant vagrant    103  3月 29 14:09 app
-rwxrwxr-x.  1 vagrant vagrant   1686  3月 29 14:09 artisan
drwxrwxr-x.  3 vagrant vagrant     34  3月 29 14:09 bootstrap
-rw-rw-r--.  1 vagrant vagrant   1550  3月 29 14:09 composer.json
-rw-rw-r--.  1 vagrant vagrant 168084  3月 29 14:09 composer.lock
drwxrwxr-x.  2 vagrant vagrant    247  3月 29 14:09 config
drwxrwxr-x.  5 vagrant vagrant     95  3月 29 14:40 database
-rw-rw-r--.  1 vagrant vagrant   1125  3月 29 14:09 package.json
-rw-rw-r--.  1 vagrant vagrant   1156  3月 29 14:09 phpunit.xml
drwxrwxr-x.  5 vagrant vagrant    129  3月 29 14:09 public
-rw-rw-r--.  1 vagrant vagrant   4131  3月 29 14:09 readme.md
drwxrwxr-x.  6 vagrant vagrant     53  3月 29 14:09 resources
drwxrwxr-x.  2 vagrant vagrant     75  3月 29 14:09 routes
-rw-rw-r--.  1 vagrant vagrant    563  3月 29 14:09 server.php
drwxrwxr-x.  5 vagrant vagrant     46  3月 29 14:09 storage
drwxrwxr-x.  4 vagrant vagrant     83  3月 29 14:09 tests
drwxrwxr-x. 40 vagrant vagrant   4096  3月 29 14:33 vendor
-rw-rw-r--.  1 vagrant vagrant    537  3月 29 14:09 webpack.mix.js
[vagrant@localhost comments]$
アクセス権を設定する.
[vagrant@localhost comments]$ sudo chown -R vagrant:apache bootstrap/cache ⏎
[vagrant@localhost comments]$ sudo chown -R vagrant:apache storage ⏎
[vagrant@localhost comments]$ sudo chown vagrant:apache database ⏎
[vagrant@localhost comments]$ sudo chown vagrant:apache database/database.sqlite ⏎
[vagrant@localhost comments]$ ls -l ⏎
合計 204
drwxrwxr-x.  6 vagrant vagrant    103  3月 29 14:09 app
-rwxrwxr-x.  1 vagrant vagrant   1686  3月 29 14:09 artisan
drwxrwxr-x.  3 vagrant vagrant     34  3月 29 14:09 bootstrap
-rw-rw-r--.  1 vagrant vagrant   1550  3月 29 14:09 composer.json
-rw-rw-r--.  1 vagrant vagrant 168084  3月 29 14:09 composer.lock
drwxrwxr-x.  2 vagrant vagrant    247  3月 29 14:09 config
drwxrwxr-x.  5 vagrant apache      95  3月 29 14:40 database
-rw-rw-r--.  1 vagrant vagrant   1125  3月 29 14:09 package.json
-rw-rw-r--.  1 vagrant vagrant   1156  3月 29 14:09 phpunit.xml
drwxrwxr-x.  5 vagrant vagrant    129  3月 29 15:06 public
-rw-rw-r--.  1 vagrant vagrant   4131  3月 29 14:09 readme.md
drwxrwxr-x.  6 vagrant vagrant     53  3月 29 14:09 resources
drwxrwxr-x.  2 vagrant vagrant     75  3月 29 14:09 routes
-rw-rw-r--.  1 vagrant vagrant    563  3月 29 14:09 server.php
drwxrwxr-x.  5 vagrant apache      46  3月 29 14:09 storage
drwxrwxr-x.  4 vagrant vagrant     83  3月 29 14:09 tests
drwxrwxr-x. 40 vagrant vagrant   4096  3月 29 14:33 vendor
-rw-rw-r--.  1 vagrant vagrant    537  3月 29 14:09 webpack.mix.js
[vagrant@localhost comments]$ ls -l bootstrap/ ⏎
合計 4
-rw-rw-r--. 1 vagrant vagrant 1620  3月 29 14:09 app.php
drwxrwxr-x. 2 vagrant apache    64  3月 29 14:33 cache
[vagrant@localhost comments]$ ls -l database/ ⏎
合計 24
-rw-rw-r--. 1 vagrant apache  22528  3月 29 14:40 database.sqlite
drwxrwxr-x. 2 vagrant vagrant    29  3月 29 14:09 factories
drwxrwxr-x. 2 vagrant vagrant    57  3月 29 14:09 migrations
drwxrwxr-x. 2 vagrant vagrant    63  3月 29 14:09 seeds
[vagrant@localhost comments]$ ls -l storage/ ⏎
合計 0
drwxrwxr-x 3 vagrant apache 36  3月 29 17:19 app
drwxrwxr-x 6 vagrant apache 76  3月 29 17:19 framework
drwxrwxr-x 2 vagrant apache 23  3月 29 17:19 logs
[vagrant@localhost comments]$
.htaccess の編集
今回は,http://192.168.33.120/ ではなく,http://192.168.33.120/comments/ に設置したいので,public フォルダ内の .htaccess を編集する.編集前の .htaccess は次のような内容になっているはずである.
/var/www/laravel/comments/public/.htaccess
<IfModule mod_rewrite.c>
    <IfModule mod_negotiation.c>
        Options -MultiViews -Indexes
    </IfModule>

    RewriteEngine On

    # Handle Authorization Header
    RewriteCond %{HTTP:Authorization} .
    RewriteRule .* - [E=HTTP_AUTHORIZATION:%{HTTP:Authorization}]

    # Redirect Trailing Slashes If Not A Folder...
    RewriteCond %{REQUEST_FILENAME} !-d
    RewriteCond %{REQUEST_URI} (.+)/$
    RewriteRule ^ %1 [L,R=301]

    # Handle Front Controller...
    RewriteCond %{REQUEST_FILENAME} !-d
    RewriteCond %{REQUEST_FILENAME} !-f
    RewriteRule ^ index.php [L]
</IfModule>
これを次のように編集する.
/var/www/laravel/comments/public/.htaccess
<IfModule mod_rewrite.c>
    <IfModule mod_negotiation.c>
        Options -MultiViews -Indexes
    </IfModule>

    RewriteEngine On

    # Handle Authorization Header
    RewriteCond %{HTTP:Authorization} .
    RewriteRule .* - [E=HTTP_AUTHORIZATION:%{HTTP:Authorization}]

    RewriteBase "/comments/"

    # Redirect Trailing Slashes If Not A Folder...
    RewriteCond %{REQUEST_FILENAME} !-d
    RewriteCond %{REQUEST_URI} (.+)/$
    RewriteRule ^comments/(.*) %1 [L,R=301]

    # Handle Front Controller...
    RewriteCond %{REQUEST_FILENAME} !-d
    RewriteCond %{REQUEST_FILENAME} !-f
    RewriteRule ^ index.php [L]
</IfModule>
Apache の設定
最後に Apache の設定を行う./etc/httpd/conf.d/ に設置するが,フォルダのファイルの一覧を確認する.
[vagrant@localhost comments]$ cd ⏎
[vagrant@localhost ~]$ cd /etc/httpd/conf.d/ ⏎
[vagrant@localhost conf.d]$ ls ⏎
README  autoindex.conf  userdir.conf  welcome.conf
[vagrant@localhost conf.d]$
ここに,laravel-comments.conf(ファイル名は任意)を設置する.
[vagrant@localhost conf.d]$ sudo touch laravel-comments.conf ⏎
[vagrant@localhost conf.d]$ ls ⏎
README  autoindex.conf  laravel-comments.conf  userdir.conf  welcome.conf
[vagrant@localhost conf.d]$
laravel-comment.conf を編集する.
/etc/httpd/conf.d/laravel-comments.conf
Alias /comments "/var/www/laravel/comments/public"

<Directory "/var/www/laravel/comments/public">
#   Options Indexes FollowSymLinks MultiViews
    AllowOverride all
    Require all granted
</Directory>
Apache を再起動して動作確認
Apache の設定をテストして,問題がなければ再起動する.再起動後にブラウザから http://192.168.33.120/comments/ や http://192.168.33.120/comments/comments/ などにアクセスして正しく動作する事を確認できたら完了である.また,Laravel を使用しない http://192.168.33.120/ も引き続きアクセス出来ることも確認しておこう.
[vagrant@localhost conf.d]$ sudo apachectl configtest ⏎
AH00558: httpd: Could not reliably determine the server's fully qualified domain name, using localhost.localdomain. Set the 'ServerName' directive globally to suppress this message
Syntax OK
[vagrant@localhost conf.d]$ sudo systemctl restart httpd ⏎
[vagrant@localhost conf.d]$

